A useful mockup starts with a specific message, not a list of features. This walkthrough uses a fictional project update and the controls available in the TweetSim fake tweet maker. The sample settings below were entered in the editor while preparing this guide.
Copy these example settings
Use Tweetsim Demo as the display name and @tweetsim_demo as the handle. Set the theme to Light, choose No Checkmark, and paste this text:
Fictional example: Small steps count. Today I finished the first page of my project.
Enter 12 replies, 34 reposts, 1234 likes, and 5678 views.
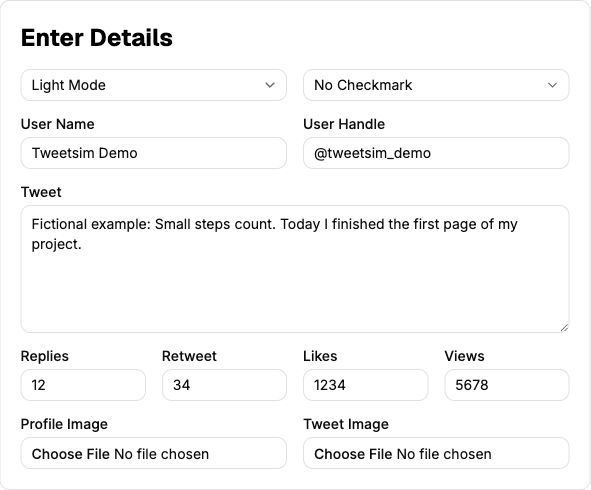
The editor settings used for this walkthrough, captured before the interface refresh. The current controls are grouped under Account, Post and Engagement. This is a fictional example, not a published post.
Check the live preview
The preview updates as you type; the homepage does not have a separate Generate step. On desktop, the example displays 12, 34, 1.2K, and 5.7K. The shorter labels are formatting, not lost data. Clearing a count represents zero.
On the current mobile layout, the reply, retweet, and like numbers are hidden in the preview to save space; views remain visible. Use desktop if showing every engagement count is important to your image.
Choose the appearance
The theme selector offers Light, Dark, and Dim modes. The badge selector offers no checkmark, blue, or gold. These badges are decorative parts of a mockup; selecting one does not verify an account on X.
Use Profile photo to choose your own logo or an image you have permission to use. The separate Attached image field adds a picture below the text. The current picture area uses a landscape crop, so check that faces, text, and important details remain visible.
Choose the post date and time
Use the Post date calendar and Post time field to set a timestamp in your local time zone. The calendar has month and year dropdowns for selecting older dates. The preview uses short relative labels such as 5m and 12h for posts less than a day old. Older dates in the current year show the month and day; dates in other years include the year, for example Mar 21, 2006. Select Clear date to hide the date.
Download or share the result
Select Export PNG in the toolbar below the preview. The homepage export is a PNG named tweet.png. Open the file from your browser’s downloads and check the text, crop, and theme before placing it in a slide or document.
If no file appears, check the browser’s download notification or blocked-download message. If an image is missing, wait for it to appear in the preview before trying again.
For direct sharing, select the Share image icon at the bottom-right of the tweet preview. Once the PNG is ready, select Choose app to share to open your device’s share menu. Apps and file-sharing support vary by device and browser. If sharing is unavailable, use Download PNG instead and attach the file manually. Closing the dialog without choosing an app does not publish anything.
Know the current limits
A reply count is not a conversation editor. To create a full conversation, use the reply-chain generator: add up to six replies, customize each author and message, and export the whole conversation as one PNG.
Keep the fictional label when sharing the example. To capture something a person actually posted, use the tweet-to-image converter instead; the converter guide shows that separate workflow.